Getting started
Open your first document, choose one of 150 templates and press Shift My Text. A quick tour of the reader, the toolbar and My Library.
Every feature, in the order you'll actually use it — from getting your first document into the app through to exporting it as a PDF or an audiobook. Follow it start to finish, or jump straight to the part you need.
Prefer to watch? These short narrated videos walk through each part of Type Shifter, about a minute each, with captions on screen. They were recorded in the Windows desktop app; the web and Android apps work the same way, with the layout adjusted to fit the screen. The written guide below covers everything in more detail.
Open your first document, choose one of 150 templates and press Shift My Text. A quick tour of the reader, the toolbar and My Library.
Change fonts, sizes, colours and spacing in the Appearance view, restyle just a selected passage, and save the look as your own template.
Switch on Bionic Reading, the OpenDyslexic font, a dark page, colour overlays and the reading ruler, then compare the result with the original.
Fade out everything but the sentence or paragraph you are on, speed-read one word at a time at up to 900 words a minute, and colour words by type.
Listen to any document in a natural voice, follow the highlighted sentence, and save the whole document or a passage as an MP3.
Turn a recording into text on your own computer, open the transcript as a document, and dictate straight into whatever you are writing.
Pick up where you left off in My Library, search inside every document, and highlight passages, add notes and export them for revision.
Save your document as a PDF, Word file, EPUB or web page, set up pages for printing, and keep your template and reading aids in every export.
Reorder, merge, compress and watermark PDFs, with signing, forms, redaction and more besides. Everything happens on your computer and nothing is uploaded.
Make flashcards yourself or straight from your highlights, review them just before you would forget, and study with a focus timer, calming sounds and a daily goal.
What you keep for free when the 14-day trial ends, what Premium adds for a one-time £29, and how to enter a licence key.
Type Shifter runs in three places, and they all share the same £29 licence and the same core features:
Reading, formatting, listening and OCR all run on your own device, which is why the Windows and Android apps keep working with no internet connection at all. Cross-device sync is the exception, and it is cloud-based. Carrying your library and your reading position from your laptop to your phone means those documents are stored on our servers so the other device can fetch them, so that part does need a connection.
Sync is not included in the free trial. It starts only once you activate a paid licence. During the 14 days everything stays entirely on the device you are using and nothing is uploaded anywhere. Full detail is in step 8 and in our Privacy Policy.
Everything is free for 14 days. After that, the free version keeps the basics for as long as you like, and a one-time £29 licence unlocks the whole app for life. The AI Tools are a separate optional monthly add-on — everything else in this tutorial is included in the licence.
Throughout this guide, look for these labels:
The app is a single screen with four parts. Knowing them makes the rest of this guide easy to follow.
Along the very top sit My Library, the name of the document you have open, the light and dark switch, your trial or licence badge, and Menu, which is where you enter a licence key and find help.
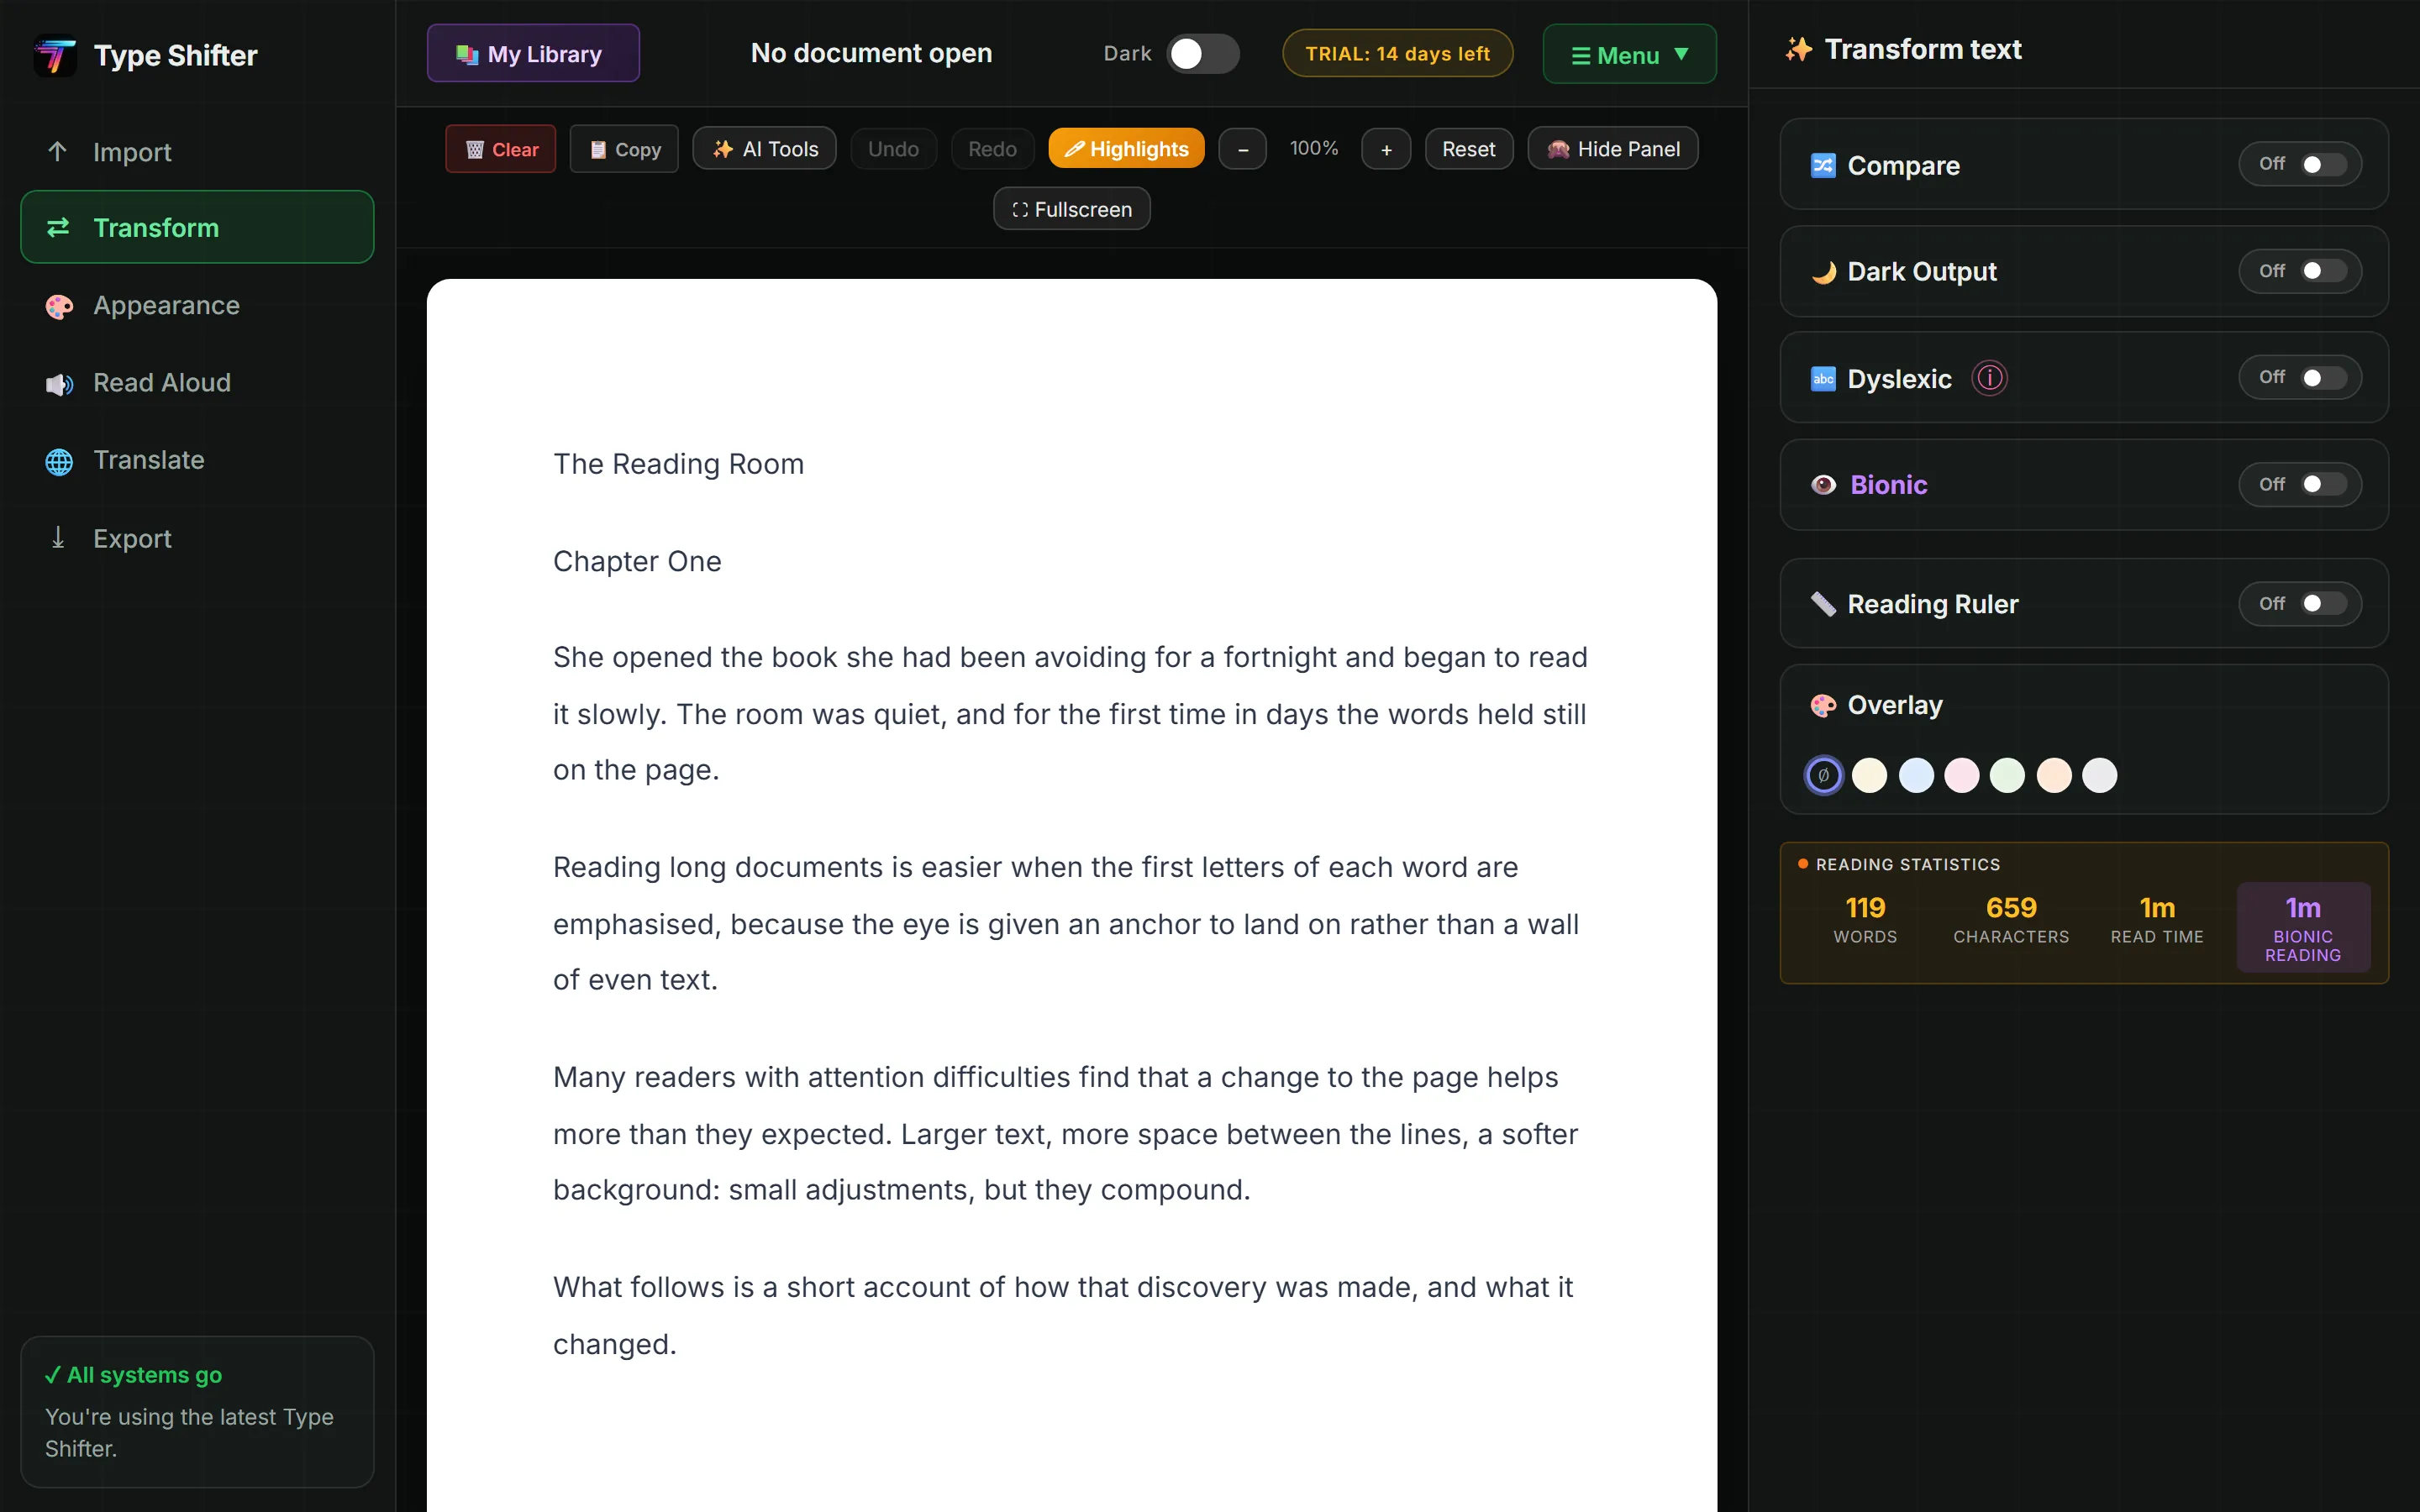
Click Import in the sidebar. The panel on the right shows TEMPLATE and UPLOAD FILE, and that is where everything starts. You bring a document to Type Shifter rather than typing into it, and there are three ways to do that.
Drag a file onto the upload box, or click it to open the file picker. Supported formats: TXT, RTF, DOCX, PDF, MD (Markdown), EPUB and HTML. The maximum file size is 10 MB.
At the bottom of the upload box, under OR PASTE A URL, paste a link into the field and press Fetch or hit Enter. Type Shifter pulls in the article text so you can read it without adverts, pop-ups or a fixed layout.
Drop in a photo, screenshot or scanned page — JPG, PNG, WEBP, BMP, GIF or TIFF — and Type Shifter extracts the text automatically. Useful for photographs of book pages, printed letters, recipes, or a screenshot of something you can't select.
Scans are rarely perfect. If the result has broken words or stray characters, the ✨ Clean up with AI button tidies it up AI add-on — see step 9.
Press SHIFT MY TEXT, at the bottom of the Import panel. Your formatted, readable document appears in the middle of the screen, and its name appears along the top.
That document, in the middle, is where everything else in this tutorial happens. A few things worth knowing about it straight away:
The TEMPLATE dropdown, at the top of the Import panel, holds 150 templates. Choosing one restyles the entire document in a single click.
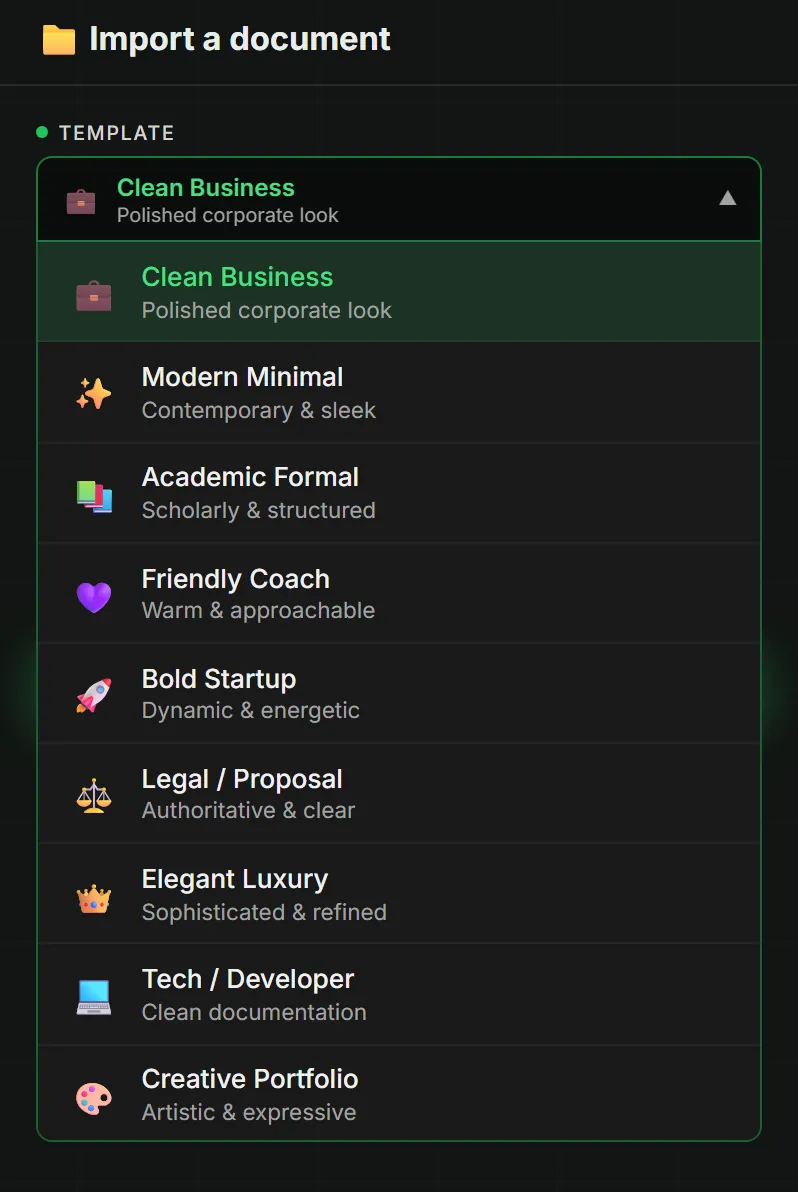
Each template sets, all at once:
They're grouped by purpose — business and corporate looks, academic and scholarly layouts, warm and friendly styles, bold startup designs, cookbooks, screenplays, comics and more. Try a few; switching is instant and nothing is lost.
A template is a starting point. Click Appearance in the sidebar to change any part of it. Every control updates the document live.
There are three font pickers — Heading, Subheading and Body — each searchable across 1,900+ Google Fonts. Set them independently, or leave any of them on the template default. This is how you keep a template's layout but swap in a typeface you find easier to read.
Three separate spacing controls, because different readers need different things:
Align Left, Align Center, Align Right or Justify for the document.
Select any passage in the document and a small toolbar appears, letting you change the font, size or colour of just that selection — handy for emphasising a quotation or a key definition without touching the rest of the document.
These are the features Type Shifter exists for, and they live together in the Transform view. They are all toggles: turn them on and off freely, and combine whichever ones help.
Bolds the first few letters of every word, creating fixation points your eye can anchor to while your brain fills in the rest. Turn it on with the Bionic toggle, then use the slider to set the intensity anywhere from 5% to 45% — the percentage of each word that gets bolded. Lower is subtler; higher is stronger. Around 40% suits most people, but it's worth experimenting.
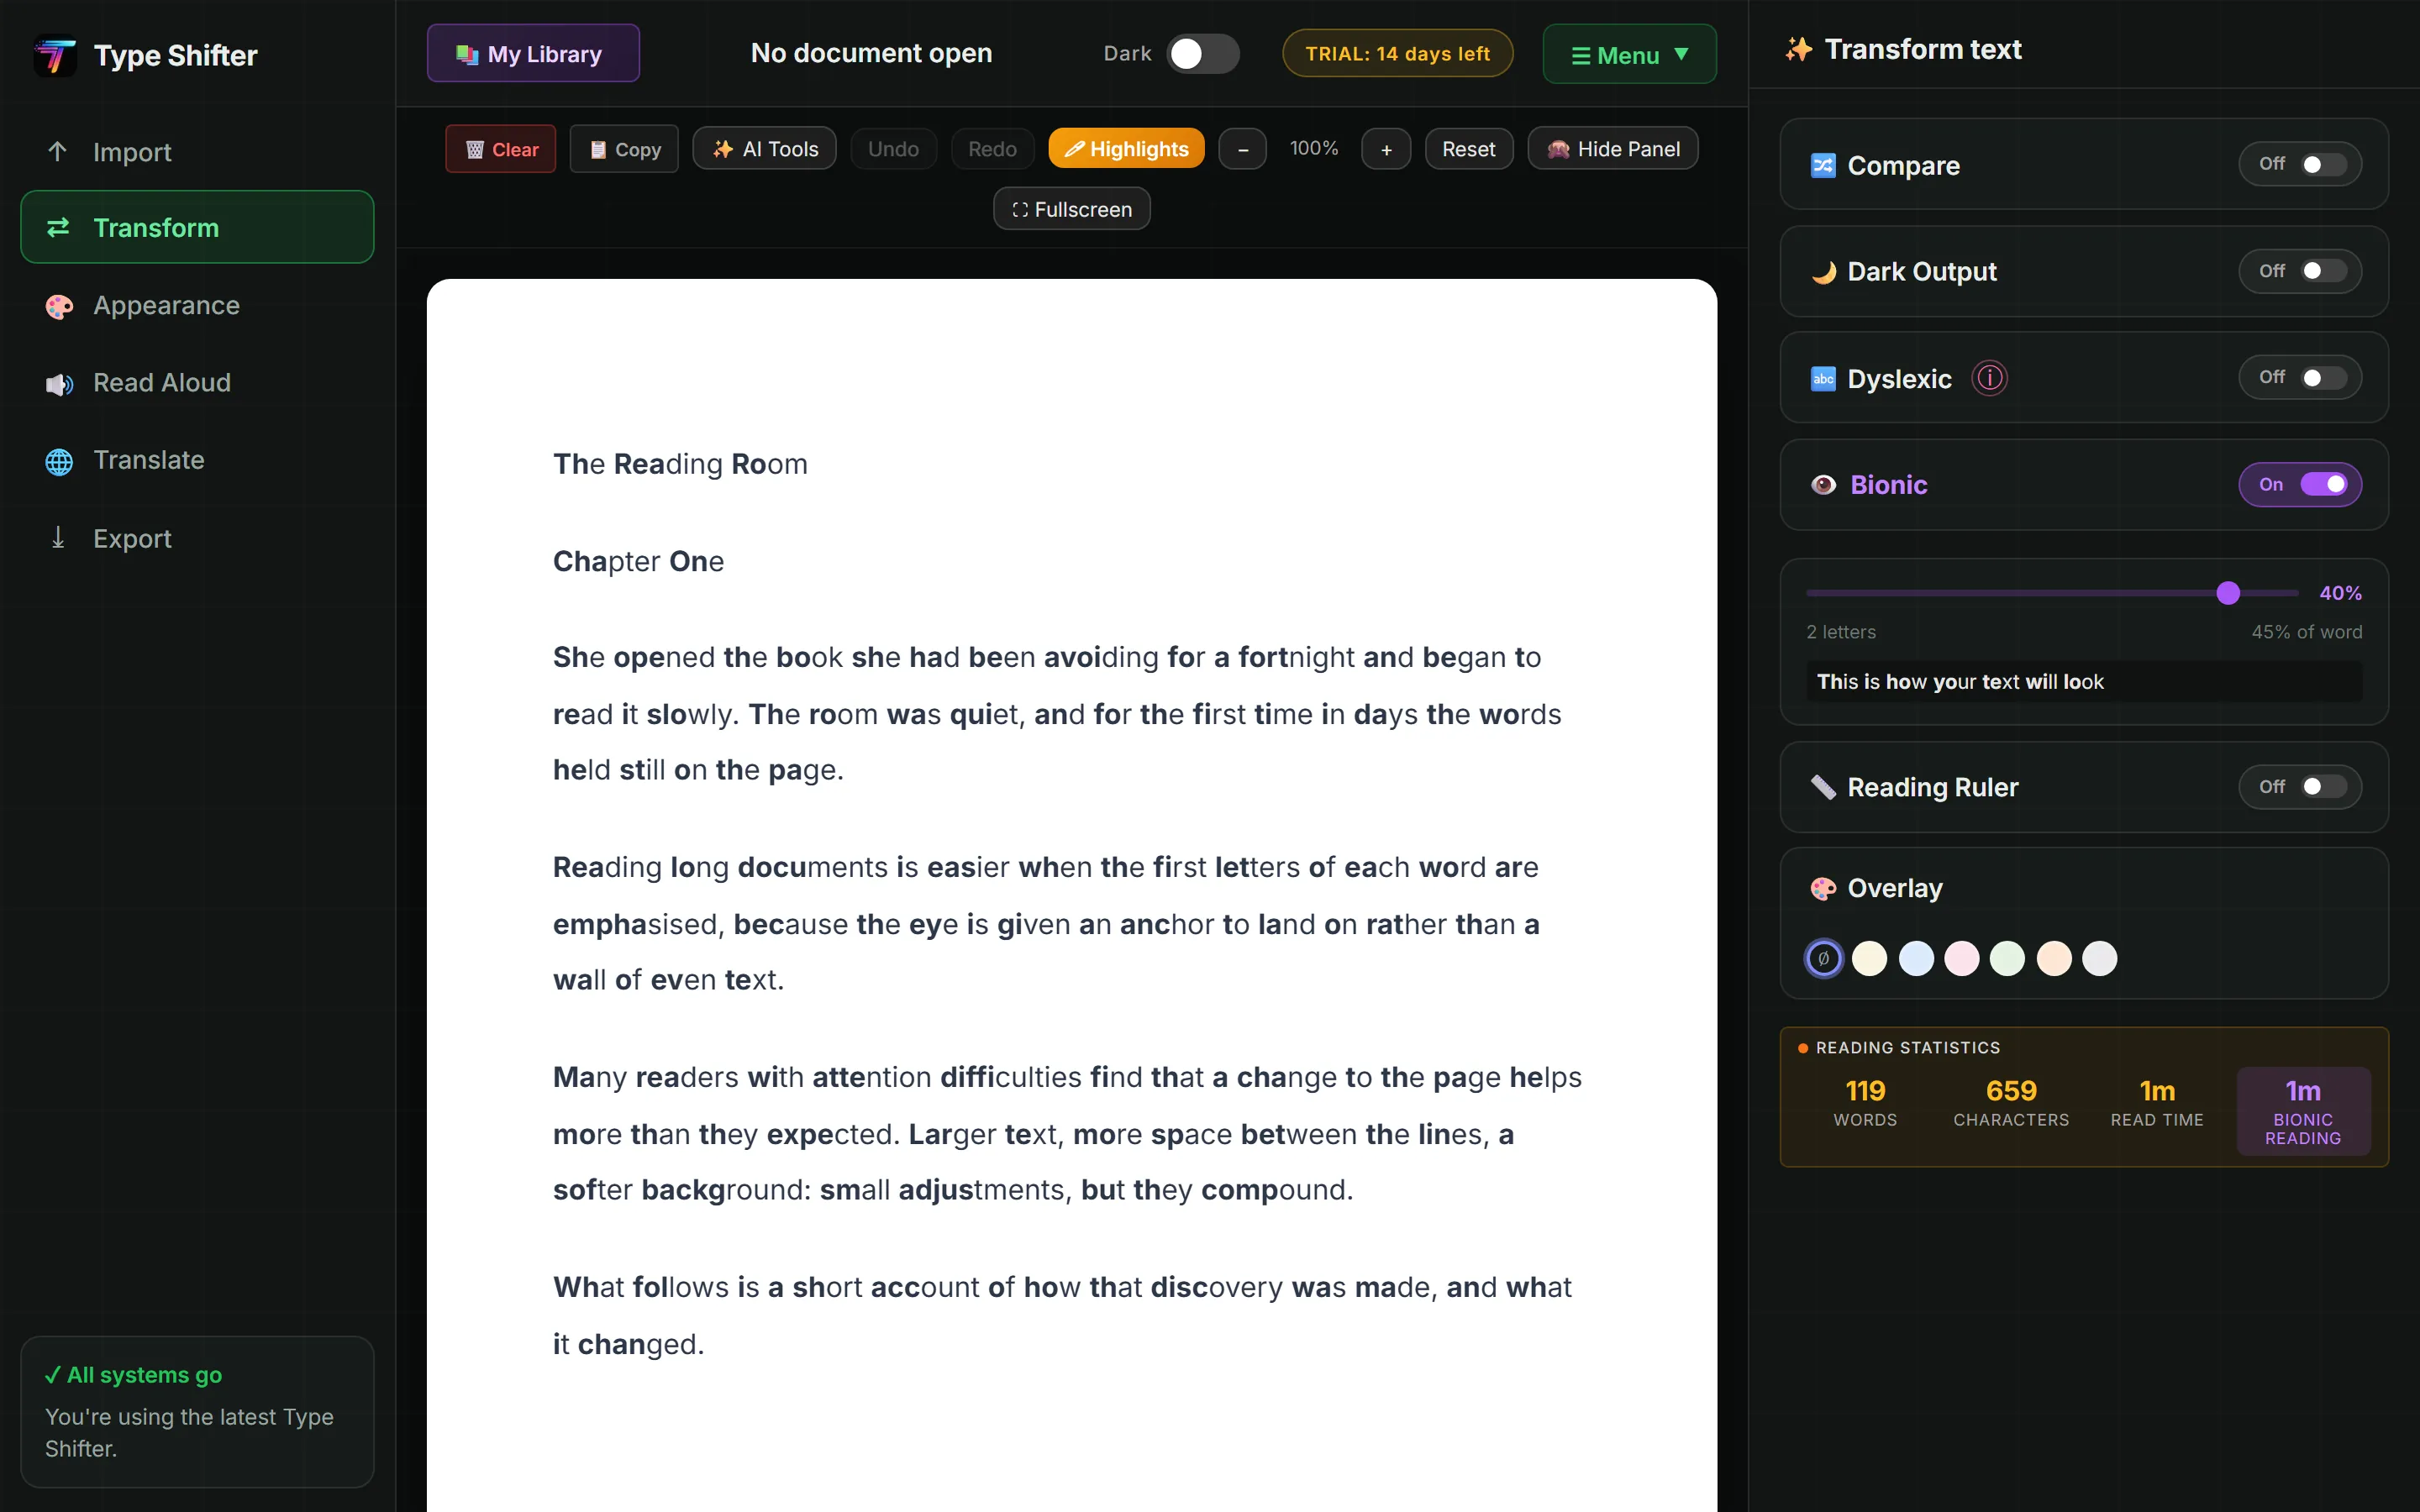
Switches the whole document to OpenDyslexic, a typeface with weighted bottoms designed to stop letters rotating or flipping as you read. It overrides all other font settings while it's on, and turning it off restores exactly what you had.
Flips the document itself to a dark background with light text, independently of the rest of the interface. Reduces glare for long reading sessions and in low light.
Puts a horizontal guide across the page that follows your pointer, so you always know which line you're on. Helps if you frequently lose your place or skip lines.
Tints the page in cream, blue, rose, green, peach or grey — the digital equivalent of a coloured reading overlay. Readers with visual stress or Irlen-type symptoms often find one specific tint dramatically more comfortable than white. Try each; the difference is usually obvious.
Shows the original and the Bionic version side by side, so you can see exactly what the formatting is doing before committing to it.
Open Read Aloud in the sidebar and press Listen to have your document read to you, with 179 voices across 49 languages, all generated on your own device.
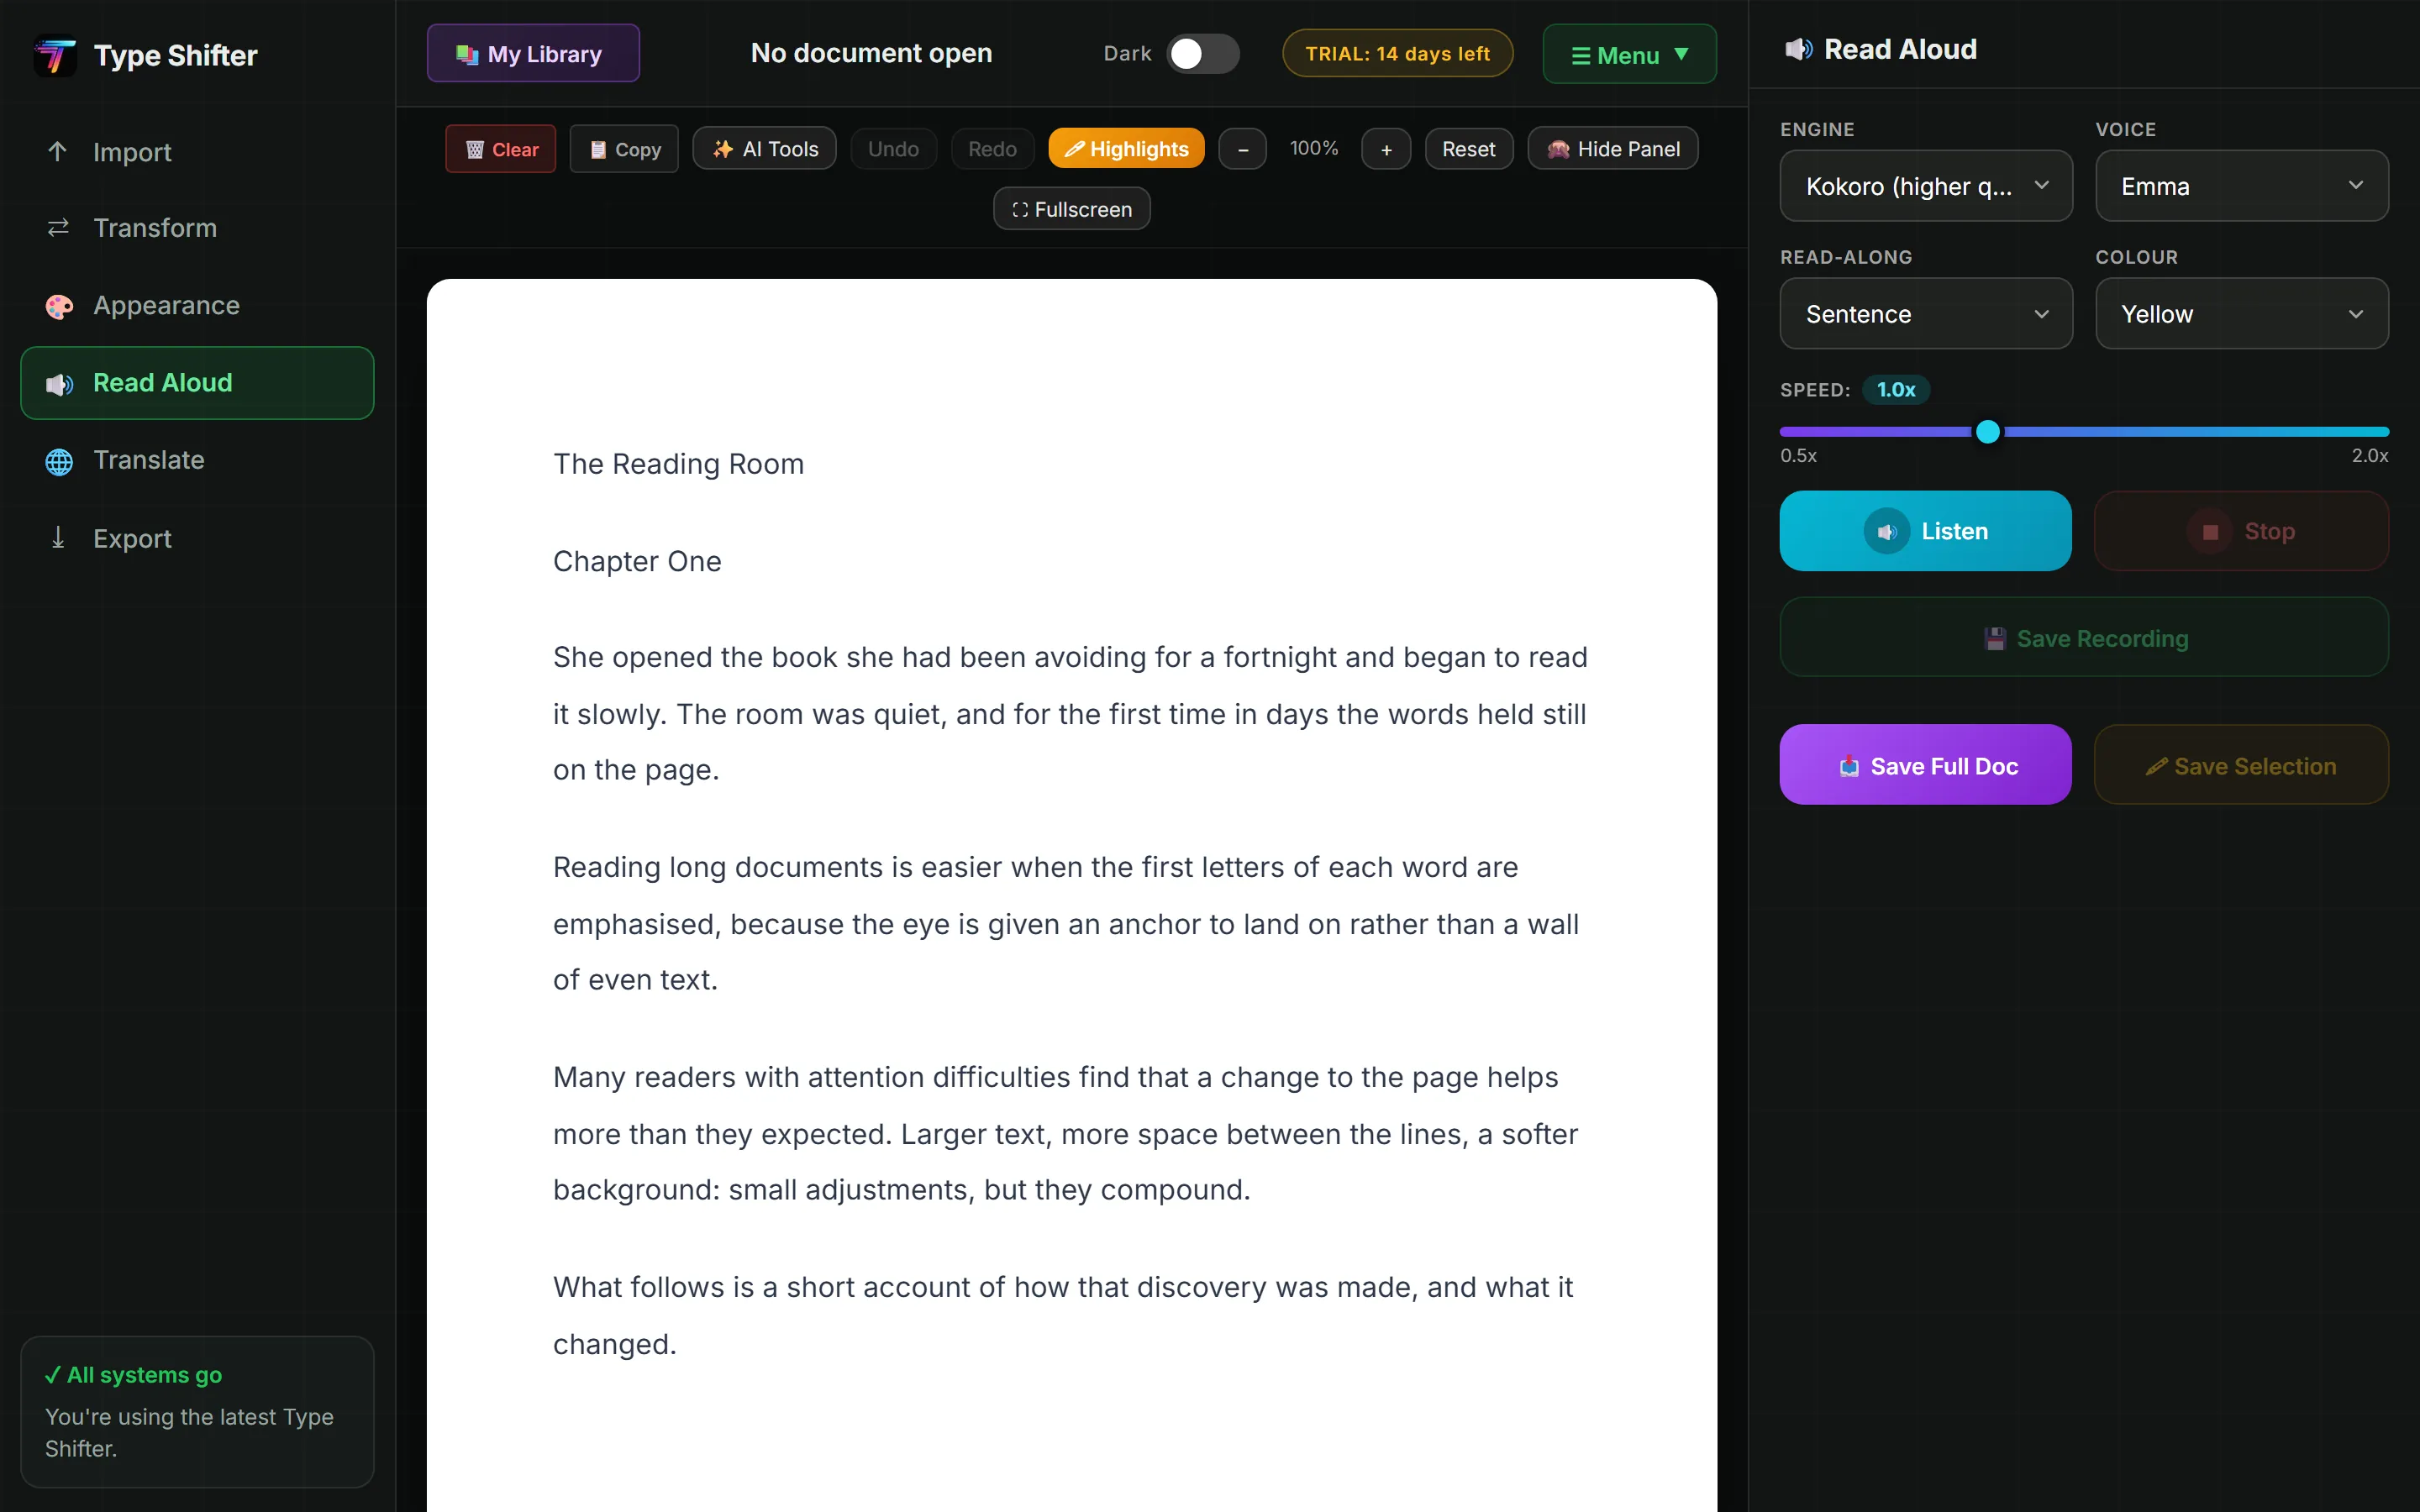
There are two engines, and you pick per document:
Turn on the highlight option and the word or sentence being spoken is highlighted as it goes, so your eyes can follow along with your ears. That dual-channel approach is one of the most effective things you can do for comprehension and focus.
Either way you get a normal MP3 file you can put on your phone, load into a podcast app, or listen to on a commute.
Select any passage and choose a highlight colour to mark it. Attach a note to a highlight if you want to record why it mattered.
Click Highlights in the toolbar above the document to see every highlight in one list, jump straight to any of them, or remove them individually. Highlights are saved with the document, so they're still there when you come back to it.
You can export your highlights and notes on their own — separately from the document — as ⬇ HTML or ⬇ Markdown. That gives you a clean set of study notes or research quotes without the surrounding text.
Every document you import is saved to My Library automatically. Open My Library at the top of the screen to see everything you have read and pick up where you left off.
Each entry remembers:
Once you've activated your licence on a device, your library syncs automatically between the Windows app, the Android app and the web app. Start a report on your laptop, carry on reading it on your phone on the train, and it opens at the paragraph you stopped at.
Open AI Tools from the toolbar above the document. Everything here works on the document currently on screen.
Condenses the document to its key points. Good for triaging a long report before deciding whether to read all of it.
Rewrites the text at an easier reading level, keeping the meaning but shortening sentences and replacing jargon. Useful for dense academic or legal material.
Ask anything about the document and get an answer grounded in its contents — "what does it say about the deadline?", "what's the main argument?". There's a microphone button if you'd rather ask out loud than type.
Generates question-and-answer pairs from the document, ready for revision. Copy them all out in one go with 📋 Copy All.
Writes descriptions of pictures embedded in the document, so screen readers have something to announce and blind or low-vision readers aren't missing content.
Appears in the Import panel, under the upload box, rather than in the AI Tools menu, because it works on a raw scan before you shift it. Fixes the mangled words, broken line breaks and stray characters that OCR produces from a photograph.
Every AI result has a 📋 Copy button. It copies the text to your system clipboard — the same place Ctrl+C puts things — so you can paste it straight into Word, an email or your notes with Ctrl+V.
| Tier | Price | Each tool, per month | Image descriptions |
|---|---|---|---|
| Tier 1 | £4.99/month | 20 | 10 |
| Tier 2 | £9.99/month | 100 | 40 |
Allowances reset each calendar month, and the tools show how much you've used. Cancel any time from the billing portal — your £29 licence and everything else in this tutorial are unaffected.
The Windows desktop app can translate a whole document into another language entirely on your own machine — no internet connection, no AI subscription, no monthly limit.
It's included free with every licence and is completely separate from the AI Tools. Because it runs locally, it's the right choice for anything confidential, and it works on a train or a plane with no signal.
The web app has its own version of the same idea, on the same engine Firefox uses for its built-in page translation. 46 languages translate inside your browser, free, with no limit and with nothing sent anywhere. The first time you pick one it downloads that language's model, usually 15 to 35 MB, and your browser keeps it, so after that the language works offline too. Choose it in the Translate view.
An article takes seconds. A book is more like ten to fifteen minutes, running in the background while the document fills in behind it, and Stop keeps whatever is finished.
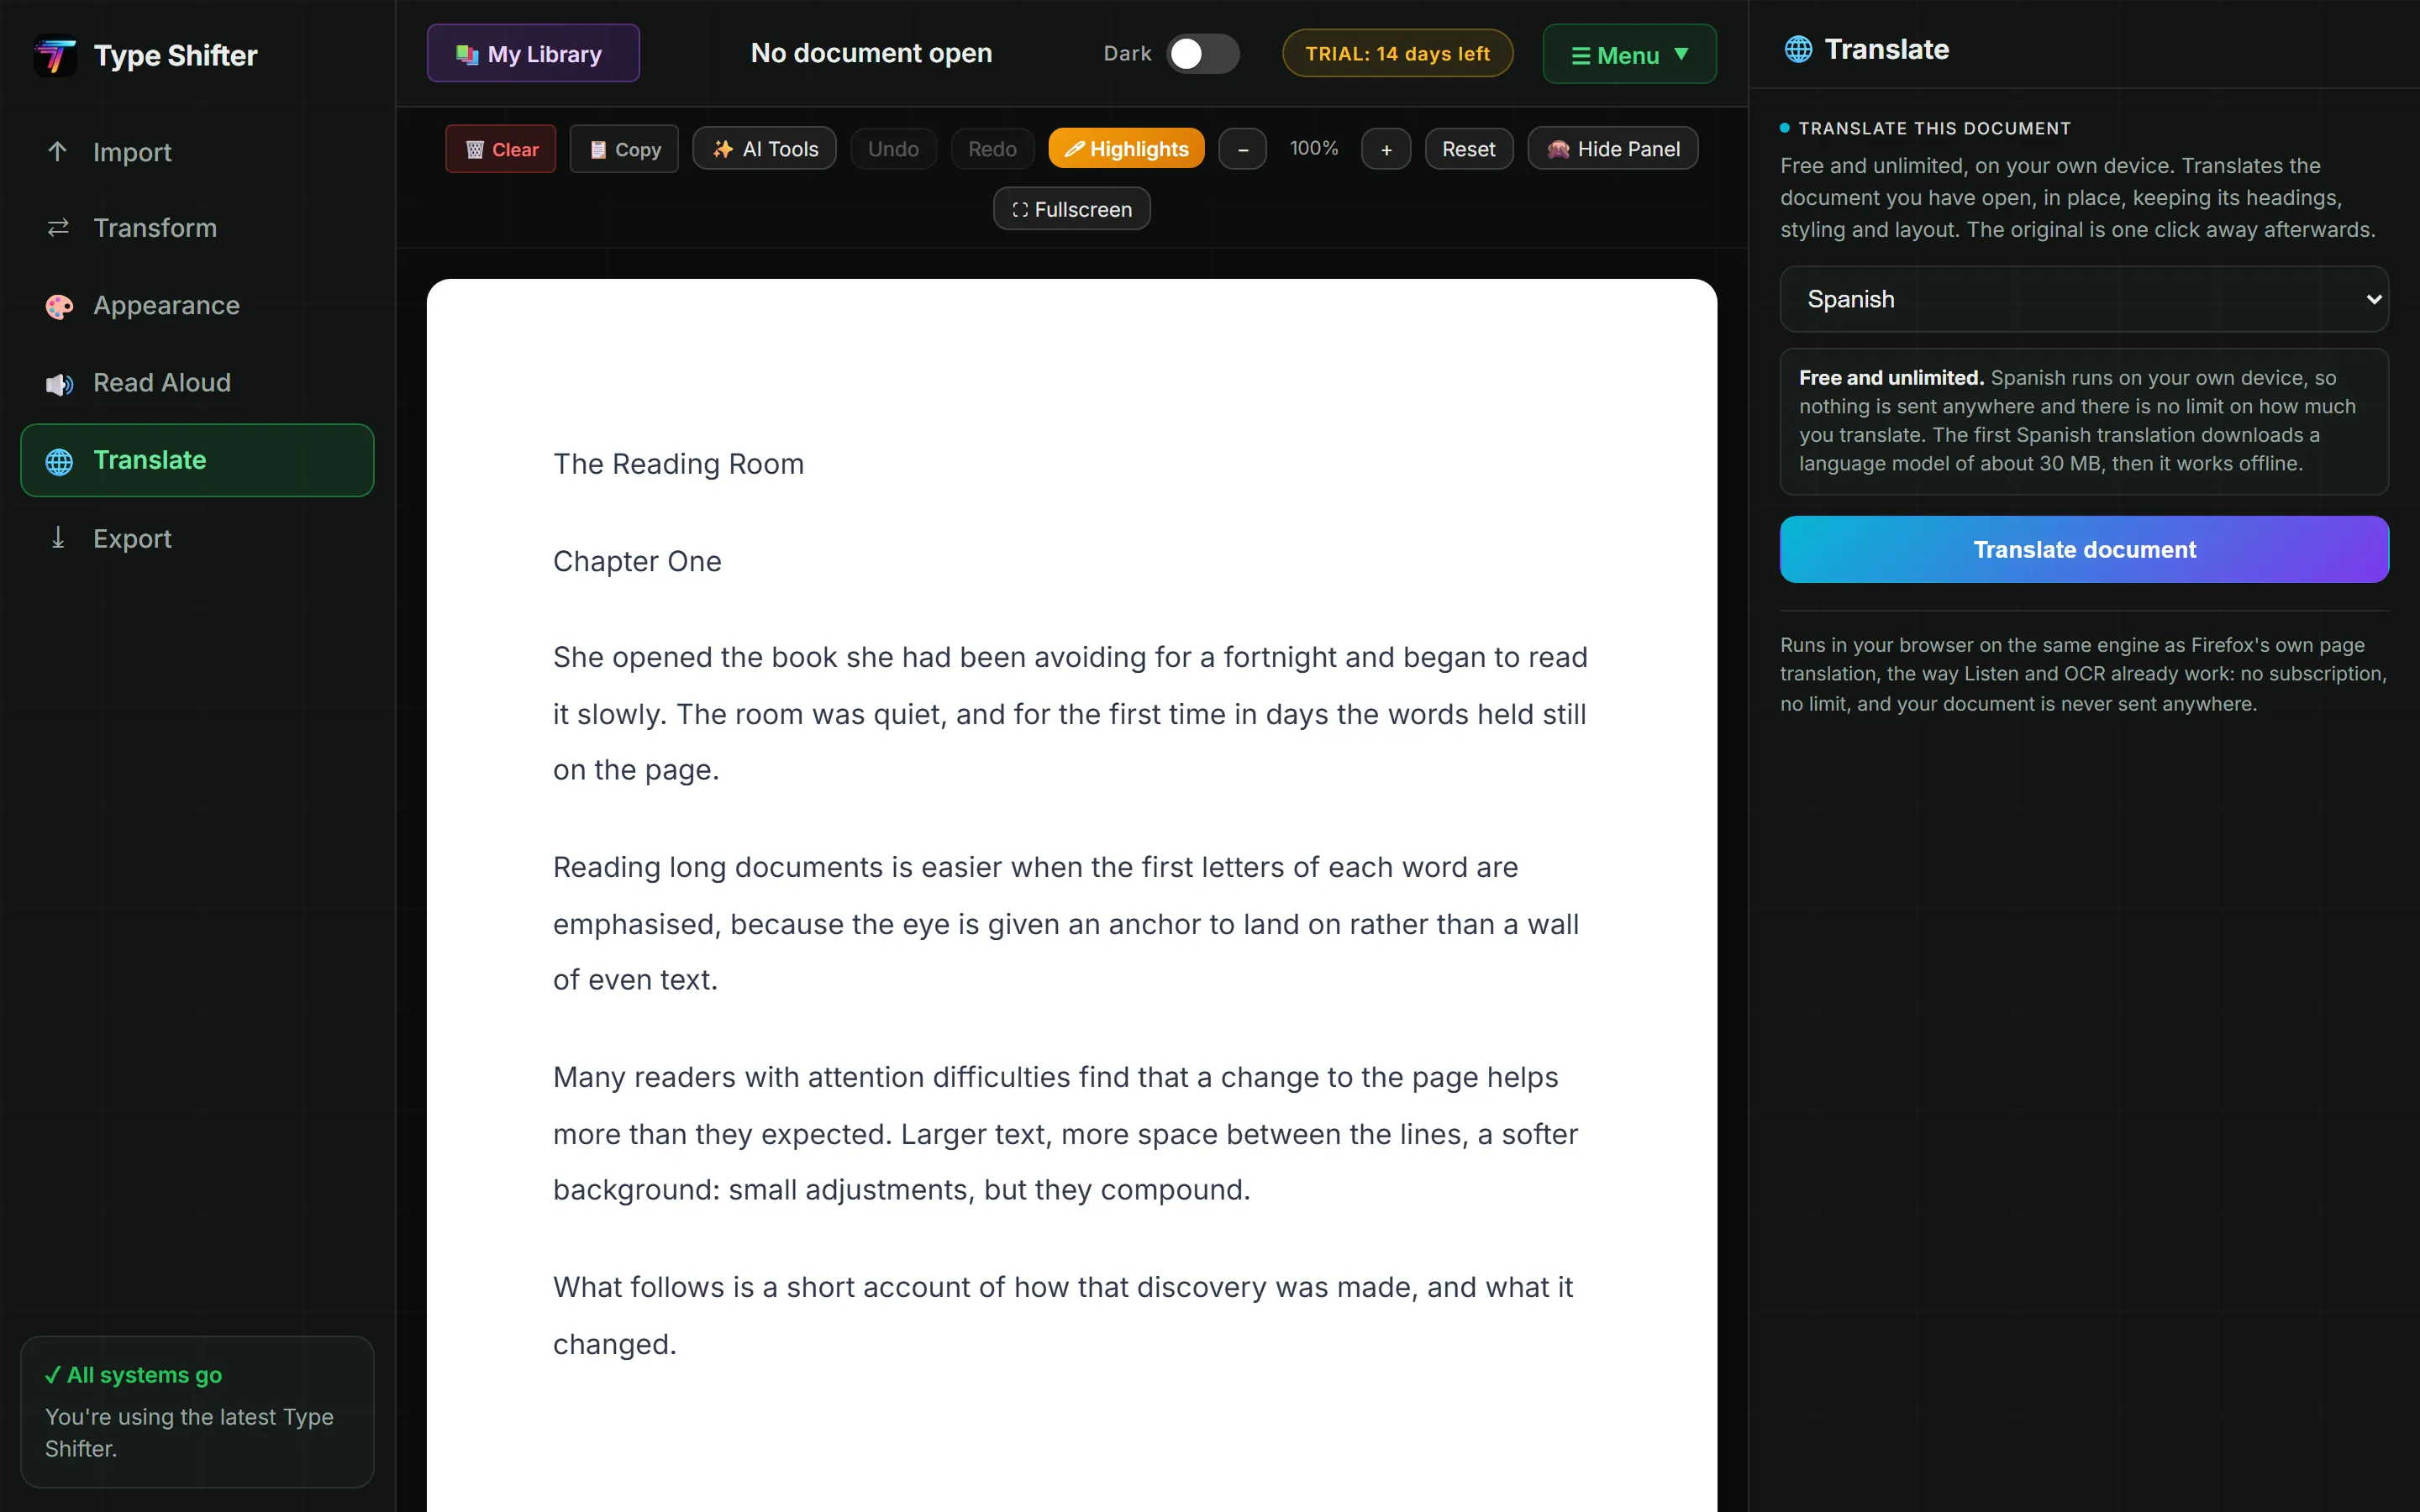
A language with no browser model is simply not offered, rather than quietly turning into something you pay for. The Windows app translates from a much larger set of language packs, so that is the one to reach for when your language is not in the list.
The exports live in the Export view in the sidebar. Every format keeps the styling you've applied — your template, fonts, colours, dark mode and Bionic formatting all carry through.
| Button | What you get | Good for |
|---|---|---|
| A styled PDF | Printing, sharing a fixed layout, handing something in | |
| 📝 Word | A .docx file | Carrying on editing in Word or Google Docs |
| 📚 EPUB | An e-book file | Kindle, Kobo, Apple Books, phone e-readers |
| ⬇ HTML | A self-contained web page | Publishing online, or archiving with styling intact |
| 📋 Copy | Text on your clipboard | Pasting anywhere with Ctrl+V |
| 💾 / 📥 MP3 | An audio file (see step 6) | Listening on the move |
Highlights and notes export separately, as PDF, Word or Markdown, from the Highlights window. See step 7.
All of these sit in the toolbar above the document.
| Feature | Where it is | Needs |
|---|---|---|
| Import TXT, RTF, DOCX, PDF, MD, EPUB, HTML | Import view | Free trial Free version |
| Fetch a web page by URL | Import view | Free trial |
| OCR, scan images to text | Import view | Free trial |
| 150 style templates | Import view | Free trial |
| 1,900+ fonts, per heading/subheading/body | Appearance view | Free trial Free version |
| Sizes, colours, line/letter/word spacing | Appearance view | Free trial Free version |
| Per-selection font, size and colour | Select text in the document | Free trial Free version |
| Bionic Reading, 5 to 45% intensity | Transform view | Free trial Free version |
| OpenDyslexic mode | Transform view | Free trial Free version |
| Dark Output | Transform view | Free trial Free version |
| Compare view | Transform view | Free trial |
| Reading ruler and colour overlays | Transform view | Free trial Free version |
| Text-to-speech, 179 voices / 49 languages | Read Aloud view | Free trial Free version: 2 voices |
| Save audio as MP3 | Read Aloud view | Free trial |
| Highlights, notes and their export | Highlights, in the toolbar | Free trial |
| Reading statistics | Transform view | Free trial Free version |
| Export PDF, DOCX, EPUB, HTML | Export view | Free trial Free version |
| My Library and reading positions | Top of the screen | Licence |
| Cross-device sync | Automatic | Licence |
| On-device translation, 46 languages | Translate view | Free trial |
| Offline Translate | Translate view, Windows app | Windows Licence |
| Summarize, Simplify, Ask, Flashcards, Describe Images | AI Tools, in the toolbar | AI add-on |
| OCR Cleanup | Import view | AI add-on |
That's the whole app. The fastest way to make it stick is to open a document you actually need to read and work through steps 1 to 6 on it.